If you own or have access to a laser engraver, templates can be a quick and easy way to design and laser cut your product. I've been cutting and designing stencils for a while now and have been using an Ortur Laser Master 3 laser engraver and my online store contains over 100 stencil products. So, here is my solution on how to laser cut a stencil.
How to laser cut templates? Depending on your application, decide which material to laser cut. My preferred material is mylar, but for low cost and single use you can use paper or card. I have used Ortur laser engravers for a few years now without issue. I used Ortur Laser Master 2 before, and this year when the upgraded version of Ortur Laser Master 3 was released, I updated my laser engraving machine.
Design vector graphics, use stencil fonts for text and numbers, and make sure graphics have enough labels to hold inside cutouts. Laser cutting is done on top of the honeycomb panels to minimize laser flashback. I bought the laser engraving machine and the honeycomb panels used in the HTPOW online store, which has many well-known brand engraving machines at very favorable prices.
These are the basics, but as with laser cutting, there are a few tricks to get the best settings and consistent results. Read on for more information and tips to make your job easier. If you don't have access to a laser and live in the US, check out the custom template options at the HTPOW online store and order what you need there.
What is a Laser Cut Stencil?
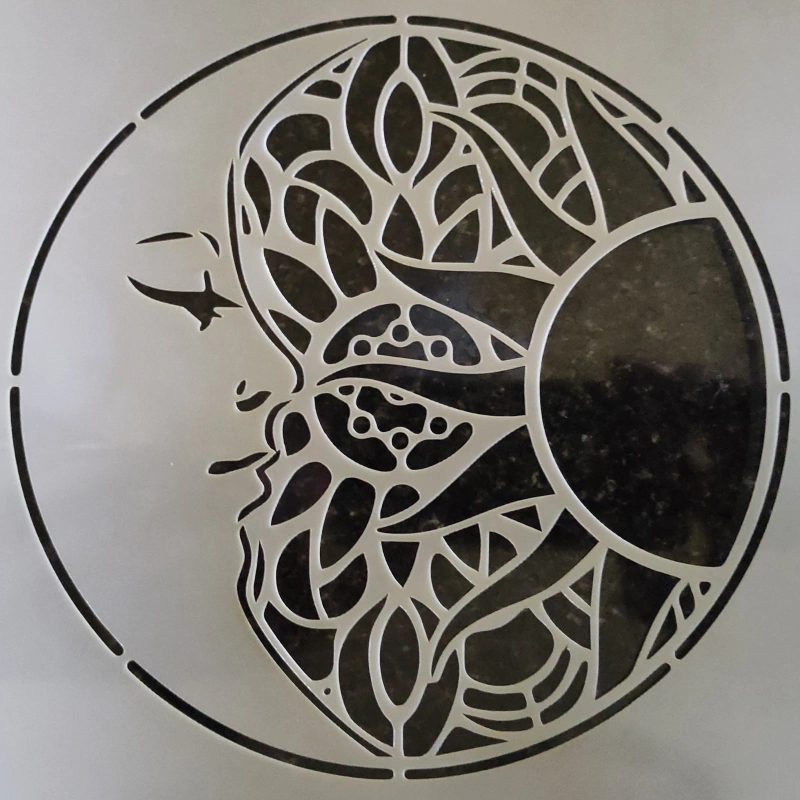
A stencil is basically a thin piece of card, plastic or metal, with a design or lettering etched on it. It is used to apply ink or paint through the holes in the design, replicating the cutout design onto a suitable surface. Paper and card templates are usually one-off templates that can even be cut by hand.
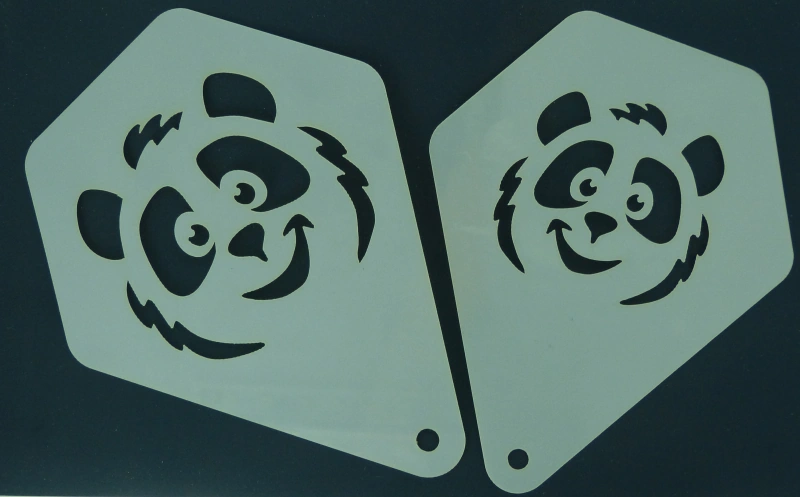
Laser cutting stencils, simply put, are stencils that have been cut with a laser. Laser cutting offers advantages such as fast turnaround, intricate detail, precision and repeatability.
At HTPOW we prefer to use Mylar Mylar due to its durability, chemical resistance and long life. However, as mentioned earlier, most semi-rigid and rigid materials can be used, such as paper, card, plastic, MDF, and wood.
You can also make templates out of thin metal that you can. The process is very similar no matter what material you use, but the laser setup will of course be different. here. You can check what materials your laser cutter can cut.
What is Mylar?
MYLAR ® polyester film is a flexible, strong and durable film with an unusual balance of properties suitable for many industrial applications. MYLAR ® Type A is a tough general purpose film with a thickness ranging from 12µm to 500µm.
In film thicknesses of 190µm and above, MYLAR® is hazy, has an average tensile strength of 210 MPa, has excellent moisture resistance and resistance to most chemicals, and can withstand temperatures from -70°C to 150°C extreme temperatures. Because it contains no plasticizers, MYLAR® A will not become brittle over time under normal conditions.
Mylar is easy to clean, solvent resistant and durable. Making it an ideal material for multipurpose formwork. We typically offer polyester films in 190, 250 and 350 microns.
Is Mylar Food Safe?
FDA Food Contact Status – All gauges of Mylar® A comply with Food and Drug Administration Regulation 21 CFR 177.1630 – Polyethylene Phthalate Polymers.
The regulation describes films that are safe for use in contact with all types of food except alcoholic beverages. Uncoated films such as Mylar® A can be used to contain food during oven cooking above 250 °F or oven baking.
So it can be used for cake templates and coffee templates etc.
How to Laser Cut Mylar Stencils
As mentioned, I tend to use 190, 250 and 350 micron mylar. In thin sheets, mylar cuts well, but can be a bit smelly and produce a lot of smoke, so good ventilation is required. If the formwork is for food use, it is best to have good airflow on the top and bottom surfaces. This removes smoke and particulates before they have a chance to stick to surfaces. Of course, mylar needs to be washed before use.
I prefer to cut on the bed of needles as it allows me to use magnets on the edges to keep the material flat. Scrap usually falls freely and there is little risk of tempering damaging the back of the material.
Laser Settings
I use the following settings:
- 190 micron Mylar: Speed 30mm/sec | Max Power 11% | Min Power 10% (approximately 8W)
- 250 micron Mylar: Speed 30mm/sec | Max power 11.5% | Min power 10% (approx. 9 watts)
- 350 micron Mylar: Speed 30 mm/s | Max Power 12% | Min Power 10% (approximately 10 watts)
The power settings for all three thicknesses of mylar were within the pre-ionization region of the laser and took advantage of the high frequency nature of this region to minimize charring or burning of the material. You will of course need to do your own materials testing to determine the settings for your particular machine.
Text-Based Template
These are pretty straightforward unless you need to use a specific font. Otherwise, you can simply choose the most suitable template font. The PDF document below shows a range of stencil fonts available, a quick Google search will reveal over 100.
Template font download available for laser cutting
If you need to use a specific font, e.g. for corporate/branding reasons. You will need to manually modify the artwork to place the tabs to keep the center piece from coming off. Once the stencil is dry, the label can be painted over.
Both LaserGRBL and Lightburn have the ability to add labels to text artwork, although the process is easier in Lightburn. Alternatively, you can use a vector drawing package such as Inkscape to do the same, and import the finished file into your laser package of choice.
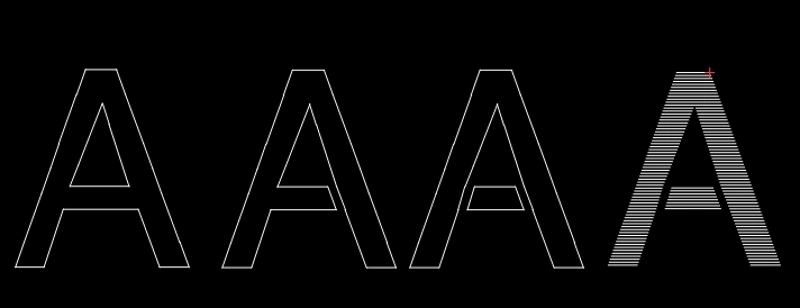
In the image above, taken from Lightburn, you can see the various stages of converting a typeface to make it suitable for stencil printing;
Raw font characters - converted to paths
- Using an edit node - one side of A is marked
- Using an edit node - both sides of A have been marked
- Select Entire Marker Character A – Closes the shape with Auto-Connect Selected Shapes
- The characters change to appear as filled layers of colored shapes.
Graphics-based templates
Graph-based templates tend to be more difficult to generate because it is not easy to spot areas where the central part may fall off. This becomes more difficult for complex graphs or geometries. A trick I use is to temporarily change the layer mode from clipping to fill, then view the entire image in the job viewer. This makes it easier to spot errors, and also picks up any unclosed shapes.
Conclusion on Laser Cutting Stencils
Stencils can be simple or complex, but no matter what material you decide to use, the process of designing and laser cutting is the same. The use of the stencil is covered in another post, but low tack spray glue can be used on the back of the stencil to hold it in place during the painting/spraying process.